
This post will detail how to create an Azure Logic App which will take input from an end user (in the form of a SharePoint list entry) and automatically provision a new shared mailbox as well as set up delegation for selected users.
Prerequisites:
- Azure Az PowerShell module
- MgGraph PowerShell module
- Working knowledge of M365/SharePoint Online/Exchange Online/Azure
SharePoint Setup
- Create a SharePoint site
- Create a SharePoint list within your SharePoint site
- Create columns as needed for the data to be input by the requesting users
Here is an example of the list I created:

Azure Automation Account Setup
Create an Automation Account in the Azure portal or via PowerShell.
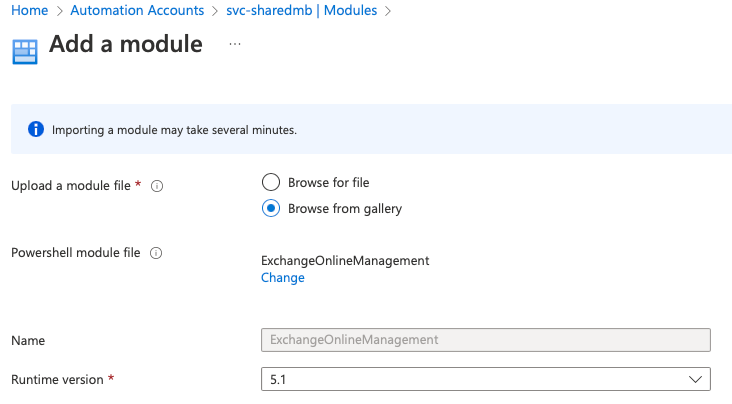
Next, navigate to Shared Resources>Modules in the Automation Account blade, and click "Browse gallery" - search for ExchangeOnlineManagement and import the module:
Now we need to grant the Exchange Online API permission for the managed identity (reference). Using a managed identity allows the Automation Account to authenticate to Exchange Online without specifying any credentials - pretty cool:
- Connect to MgGraph module:
Connect-MgGraph -Scopes AppRoleAssignment.ReadWrite.All,Application.Read.All - Connect to Azure Az module:
Connect-AzAccount - Fetch GUID for the Automation Account managed identity:
$MI_ID = (Get-AzADServicePrincipal -DisplayName "svc-exchange").Id - Assign app role to service principal:
$AppRoleID = "dc50a0fb-09a3-484d-be87-e023b12c6440"
$ResourceID = (Get-MgServicePrincipal -Filter "AppId eq '00000002-0000-0ff1-ce00-000000000000'").Id
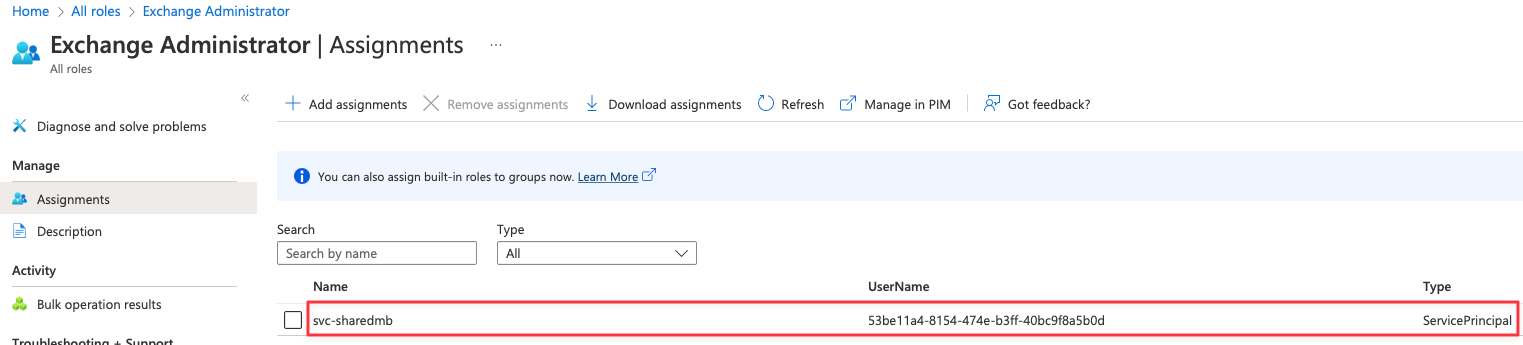
New-MgServicePrincipalAppRoleAssignment -ServicePrincipalId $MI_ID -PrincipalId $MI_ID -AppRoleId $AppRoleID -ResourceId $ResourceIDNavigate to Azure AD Roles and Administrators>Exchange Administrator>Add assignments, and select the service principal for the Automation Account:
Creating the Runbooks
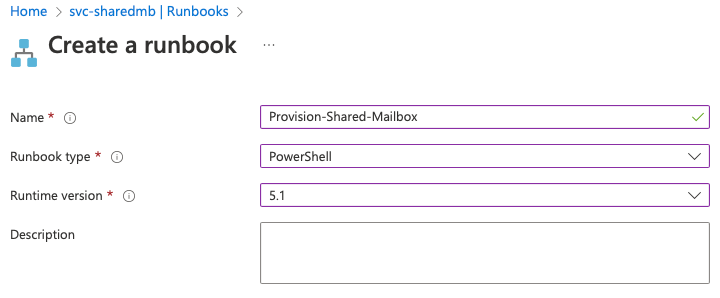
Within the Automation Account, go to Process Automation>Runbooks in the navigation blade. We will be creating two runbooks - one to provision the shared mailbox, and another to set the appropriate delegation.
Create the first runbook, adjusting the name as you see fit:
Here is a simple script for the runbook to provision the shared mailbox:
param (
    $EmailAddress,
    $DisplayName
    )

Connect-ExchangeOnline -ManagedIdentity -Organization YOUR_ORG_NAME.onmicrosoft.com

New-Mailbox -Shared -Name $DisplayName -DisplayName $DisplayName -PrimarySmtpAddress $EmailAddress
Provision Shared Mailbox script
Be sure to both Save and Publish the runbook. Then create the second runbook to set the delegation on the new shared mailbox. Here is a script for that:
param (
    $Users,
    $SharedMailbox
    )

Connect-ExchangeOnline -ManagedIdentity -Organization YOUR_ORG_NAME.onmicrosoft.com

foreach ($user in $Users) {
	Add-MailboxPermission -Identity $SharedMailbox -User $user -AccessRights FullAccess
    Add-RecipientPermission -Identity $SharedMailbox -Trustee $user -AccessRights SendAs -Confirm:$false
}
Set Shared Mailbox Delegation script
Again, be sure to Save and Publish the runbook.
Logic App Setup
- Create a new Logic App
- In the Logic App blade>Settings>Identity, turn system assigned managed identity on and click Save
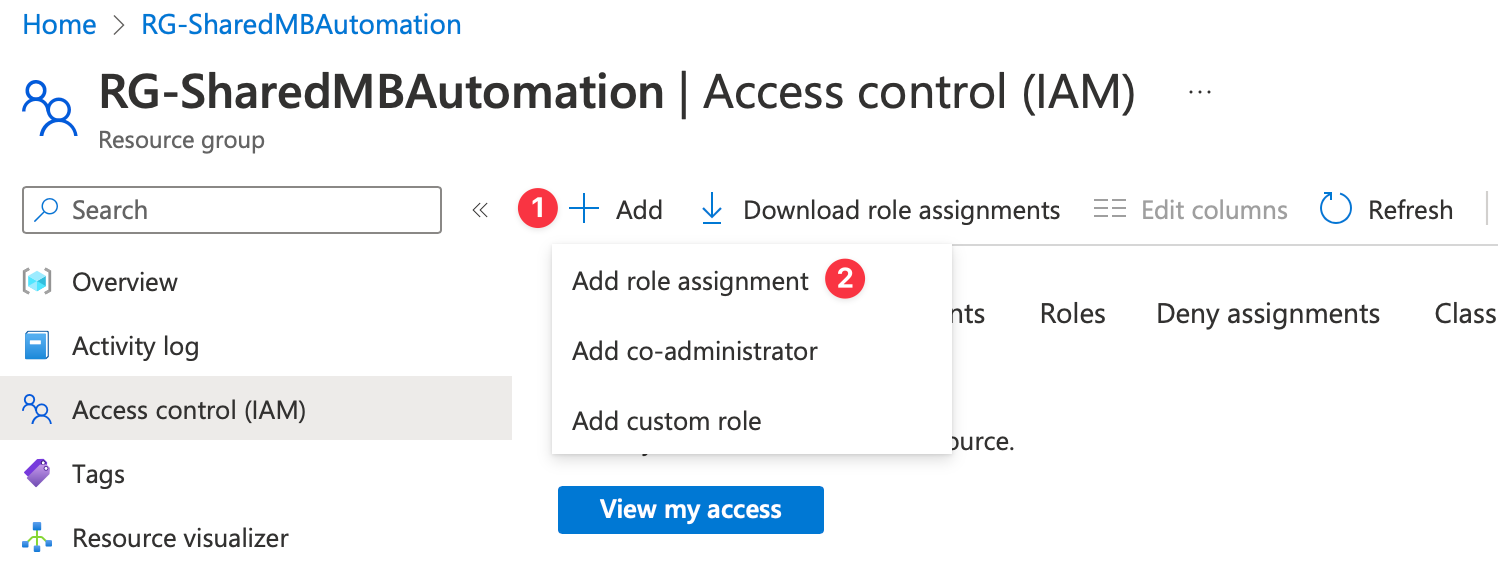
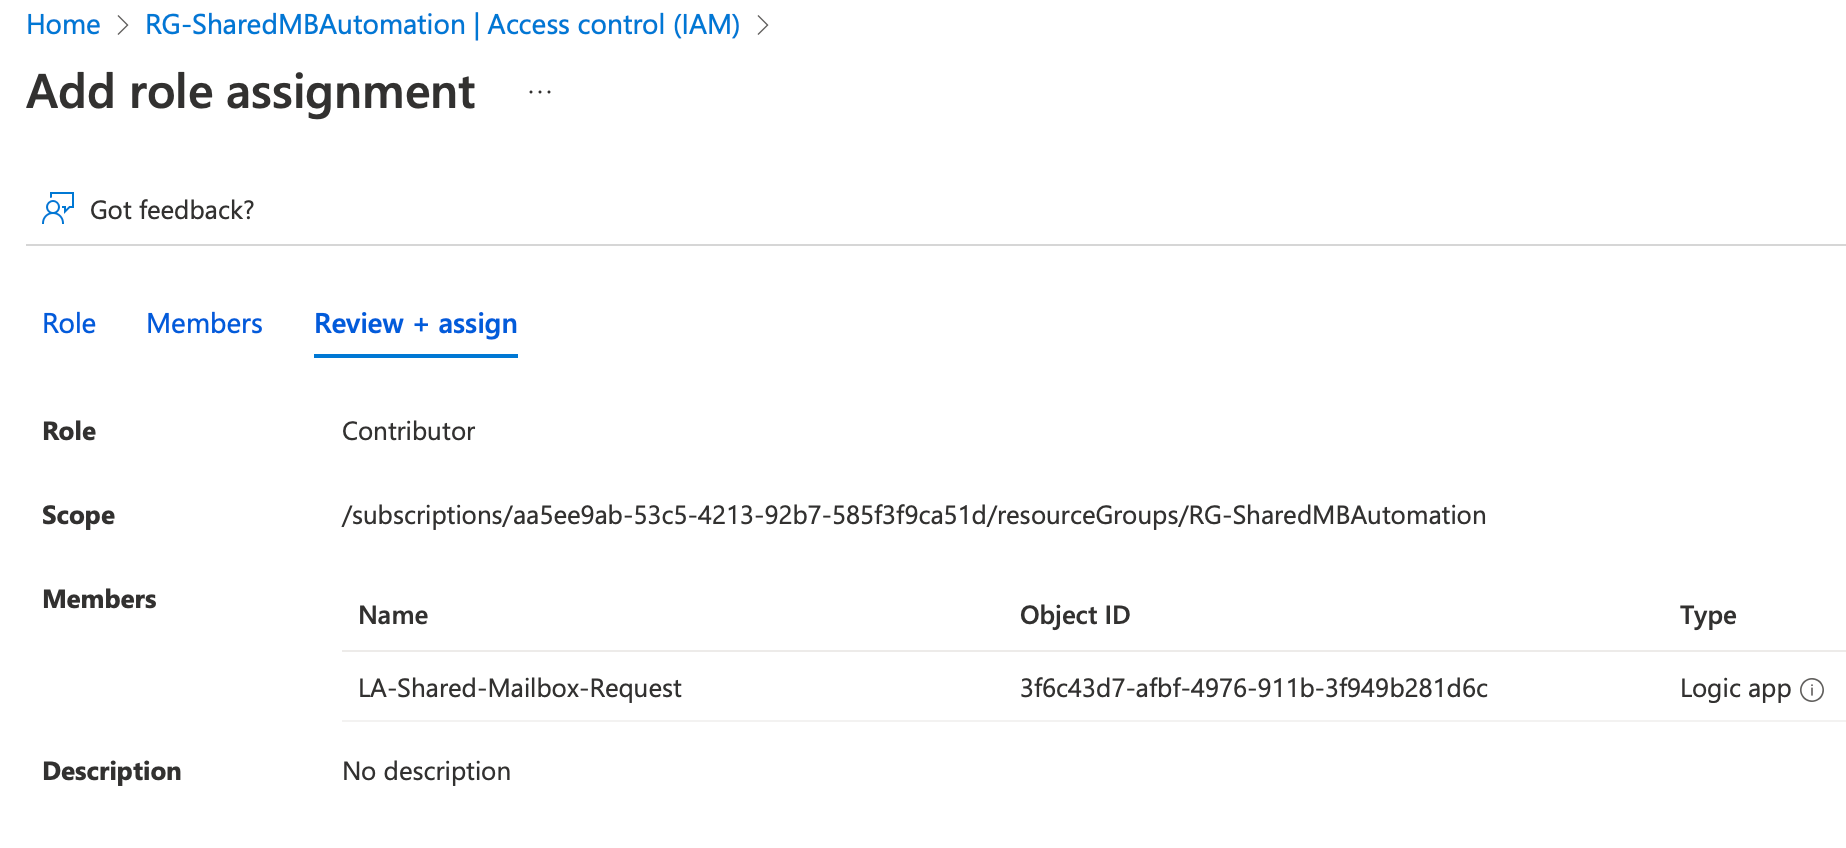
- Add the Logic App managed identity as a Contributor to the resource group the Automation Account resides in. Again, this makes it so that the Logic App can authenticate to the Automation Account to invoke the runbooks without specifying any credentials in the connection:
Building the Logic App Flow
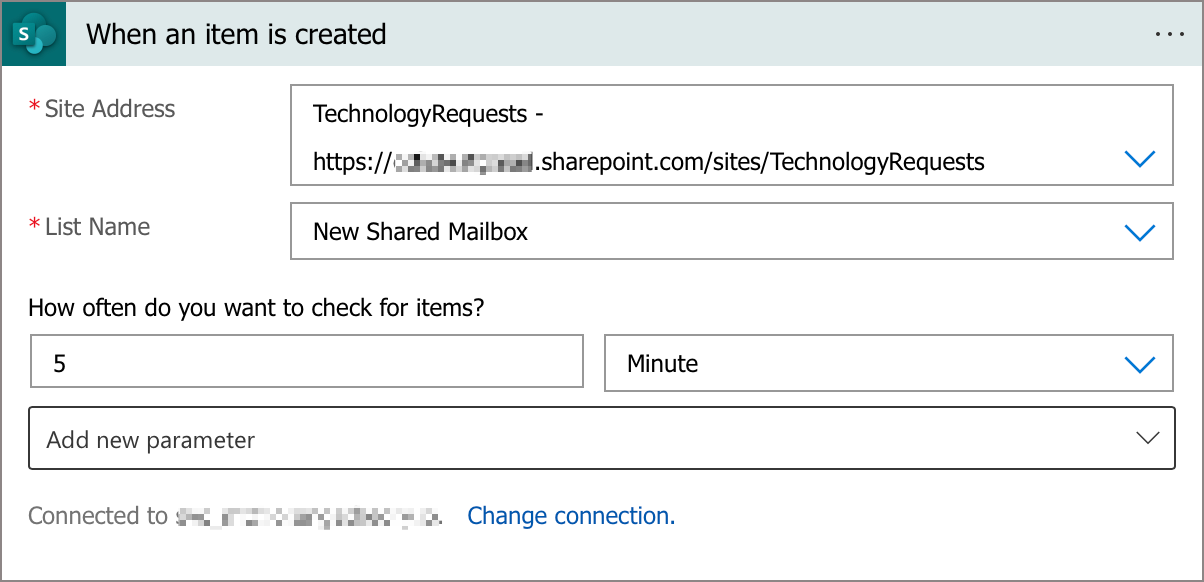
Begin building the Logic App by using a blank template. The trigger for the Logic App will be SharePoint>When an item is created. Select the SharePoint list you created earlier:
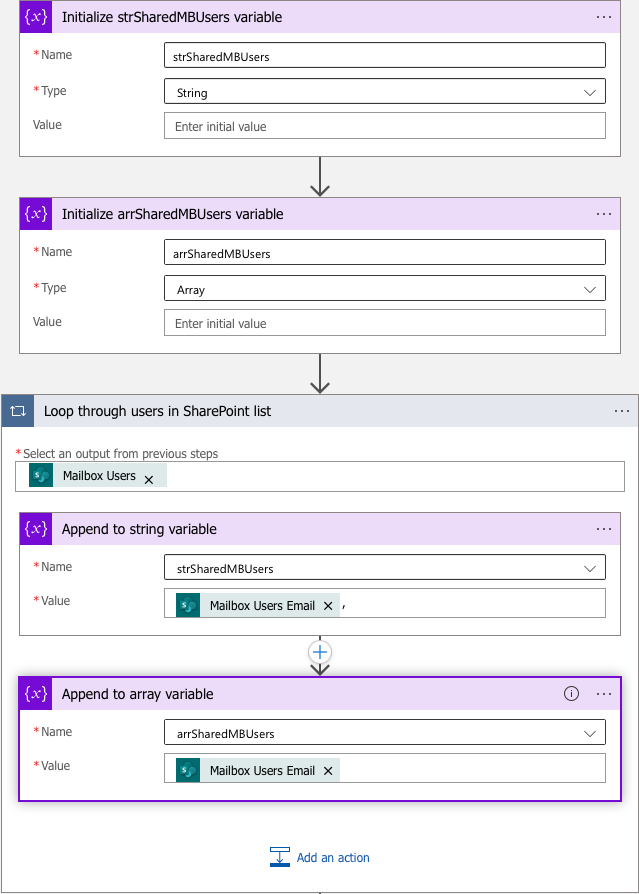
We will need to initialize a couple of variables - a string and an array. The string will be used within email notifications to display the users who will be granted permissions to the shared mailbox. The array will be used in our script for the runbook to set the mailbox permissions.
The next three steps should look like this - Initialize variable>Initialize variable>For each:
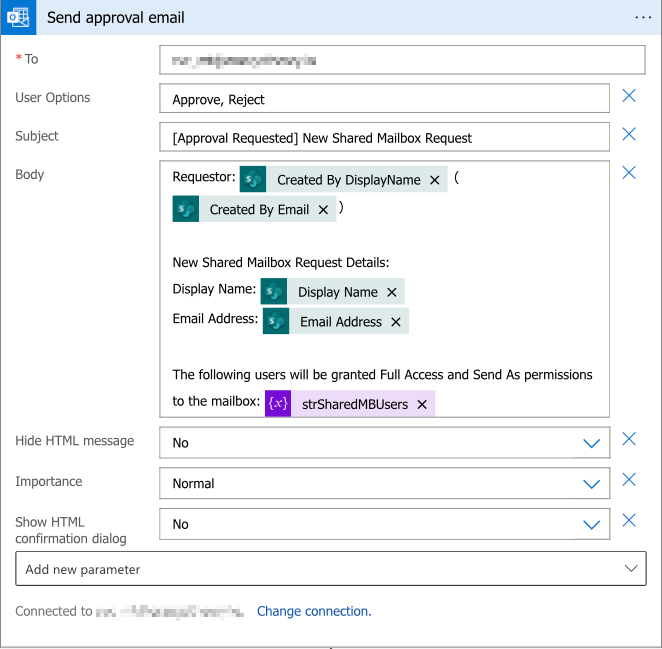
Add the next step - Office 365 Outlook>Send approval email. Fill the parameters as you see fit:
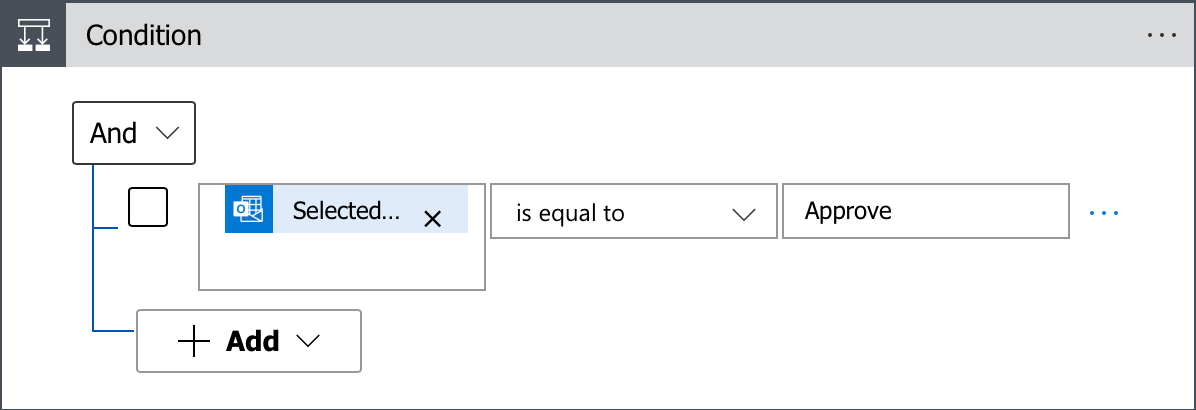
Add the next step - Condition. Build a condition for "SelectedOption is equal to Approved":
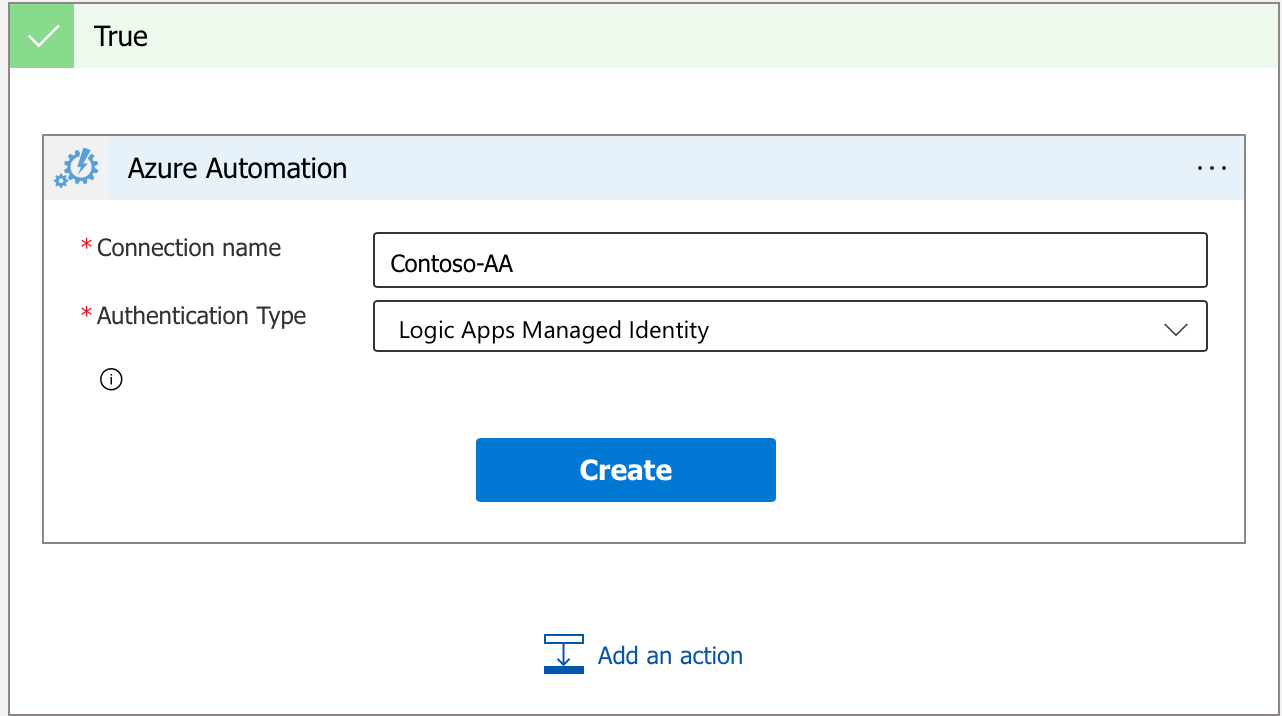
In the True branch, Add an action>Azure Automation>Create job. This is going to use our runbook to create the shared mailbox. Name the connection and select "Logic Apps Managed Identity" for the Authentication Type:
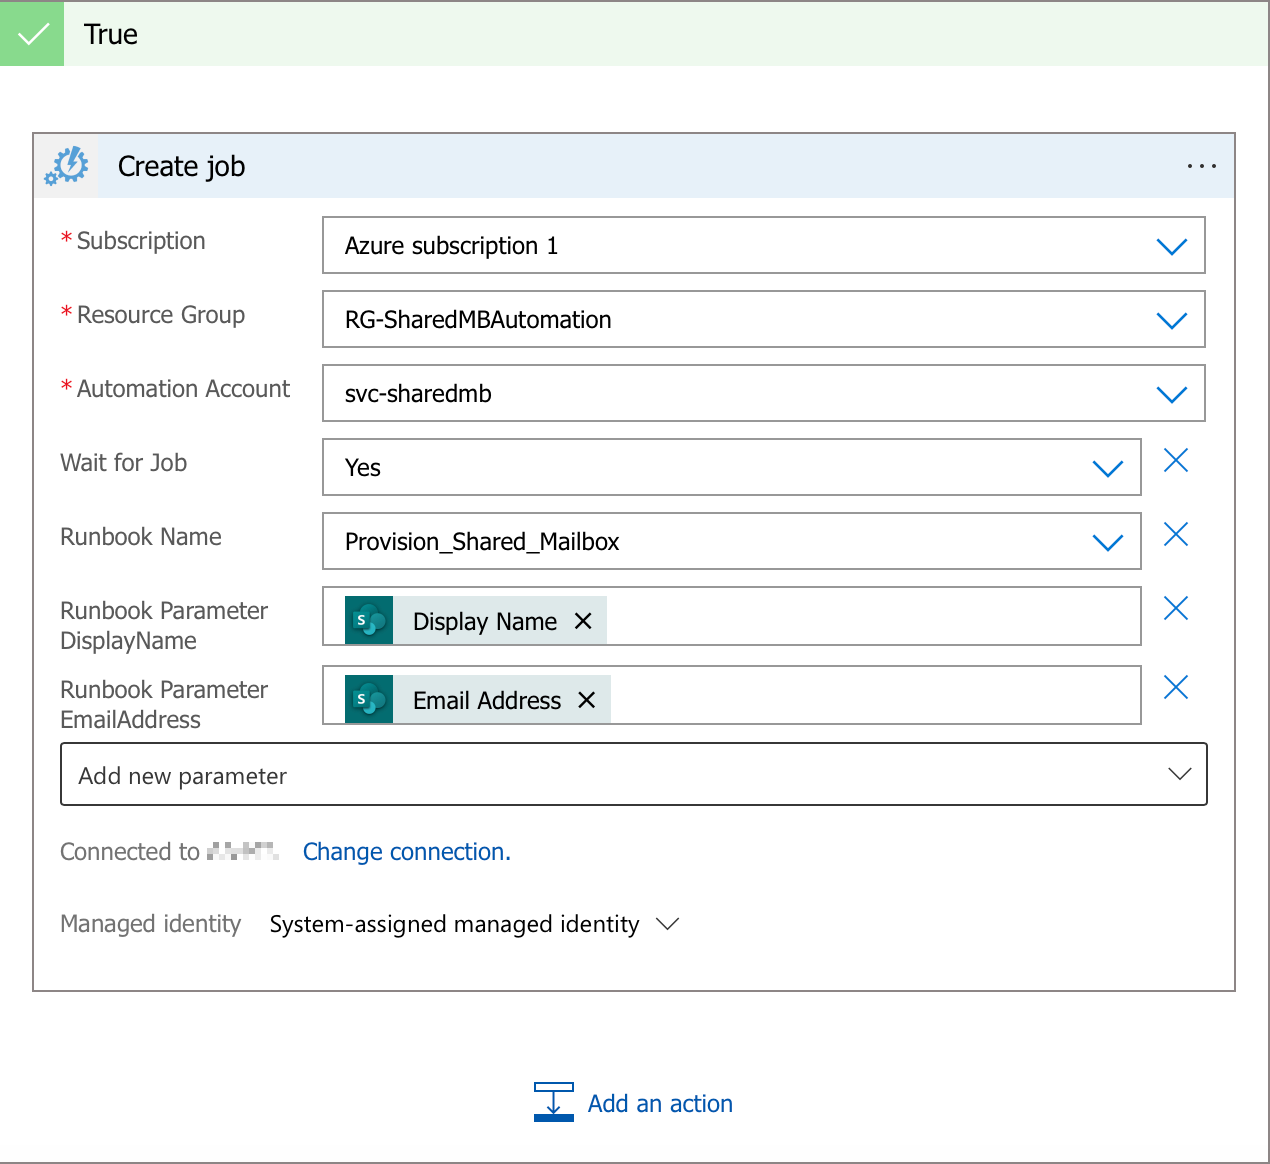
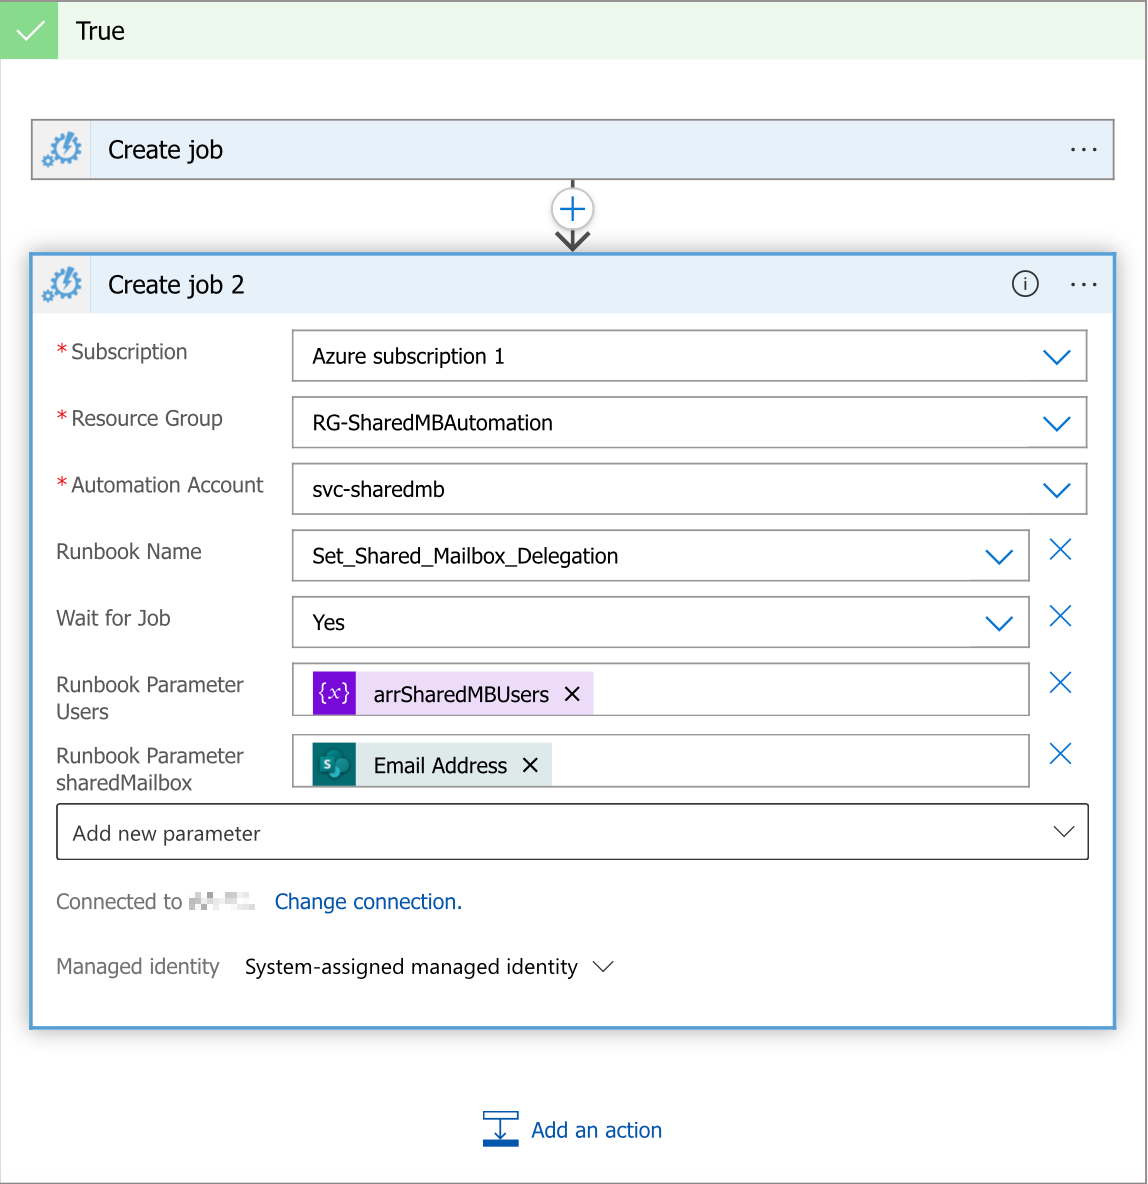
Select the Azure Subscription, Resource Group, Automation Account, and Runbook Name (you will need to use the Add new parameter drop-down menu for the runbook name). Use dynamic content from the SharePoint list for the runbook parameters:
Add an action>Azure Automation>Create job again. This is going to run the runbook which will grant Full Access and Send As permissions to the requested users. Supply the necessary parameters:
At this point the core functionality is there. I decided to add a few more email notifications - one to notify the requesting user if the request was rejected, and notifications to the administrator and the requestor when the workflow is complete.
Here is the complete workflow I created:

The Finished Product
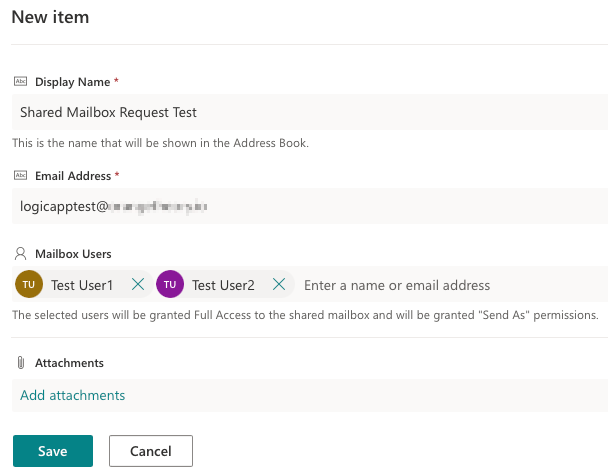
First, the end user submits an entry to the SharePoint list:
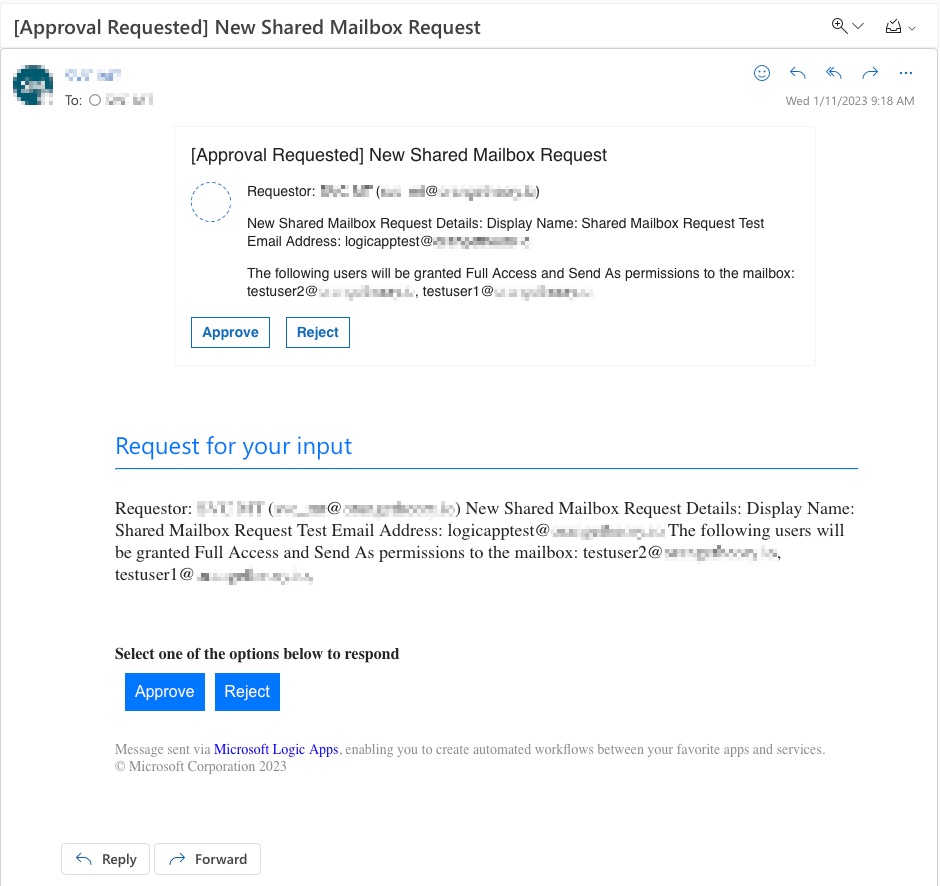
This triggers the flow, and then an approval email is sent to the administrator:
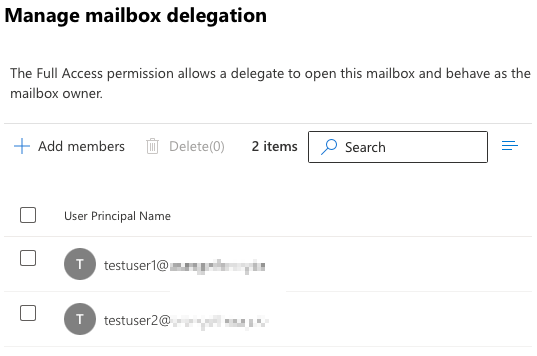
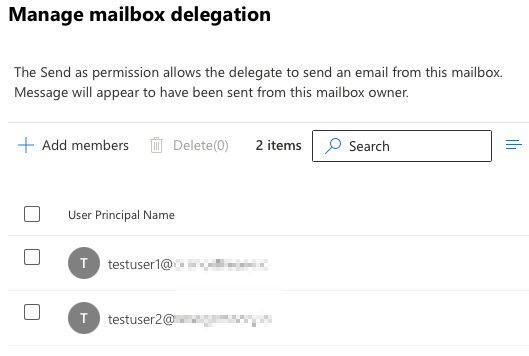
After approval is granted, the runbook jobs are launched. The shared mailbox is provisioned, and the listed users are granted Full Access and Send As permission:

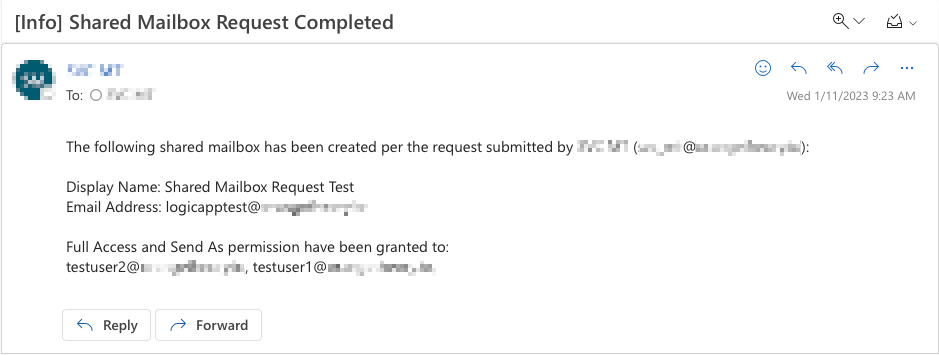
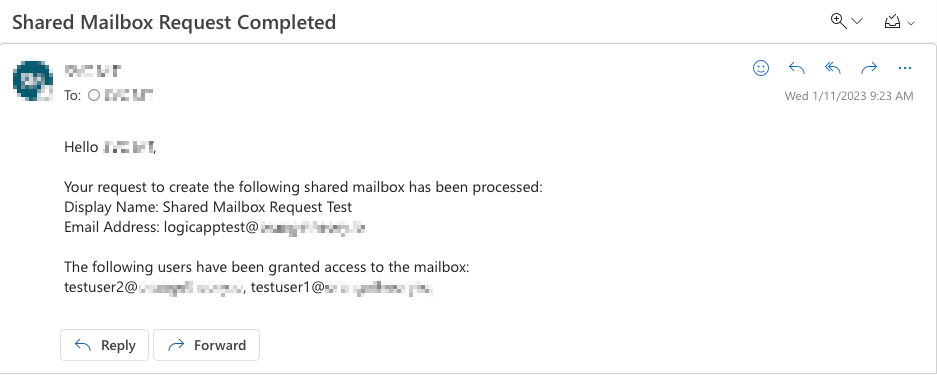
A completion email is sent to the administrator and the requesting user:
Now the workflow is complete.
Logic Apps are a great way to easily automate routine administrative tasks or helpdesk requests. Using the same general workflow described in this post, you can automate many different tasks. I hope this post helps and provokes further ideas for improvement in your environment.
