
If someone isn't able to triage and respond to an alert in a reasonable amount of time, the outcome can be less than desirable.
Say you are part of a small team and don't have a set of eyes on alerts 24/7 and something happens overnight when the team is sleeping. Your monitoring system may be working as intended and fire off an alert email in the middle of the night when certain conditions are met, but what good is it if it doesn't get anyone's attention?
If you can't afford around-the-clock detection and response, you need to prepare yourself some other way for those truly time-sensitive events which will inevitably arise at the most inconvenient of times.
I came up with this simple solution using an email as a trigger, which will generate a phone call informing the appropriate personnel to get to a PC and take action.
This post assumes some basic knowledge of REST APIs and requires a Power Automate premium license.
Plivo
Plivo is a Voice and Messaging API which I found easy to use and has good developer documentation. Their prices are reasonable and when I signed up for a trial account they provided a generous $25.00 credit.
Setup
Sign up for an account on Plivo's website. You will need to use a work email address (common personal email domains such as gmail.com are not allowed).
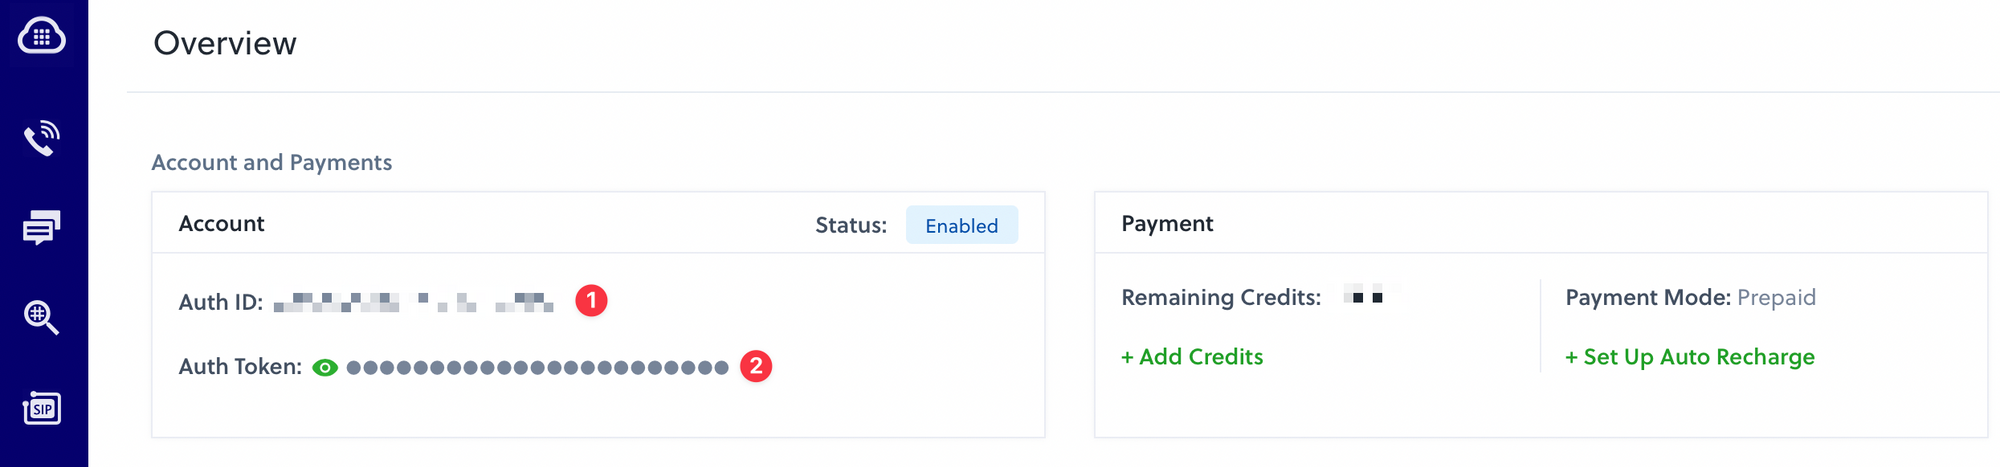
Sign in to your account, and make note of your Auth ID and Auth Token as shown on your dashboard:
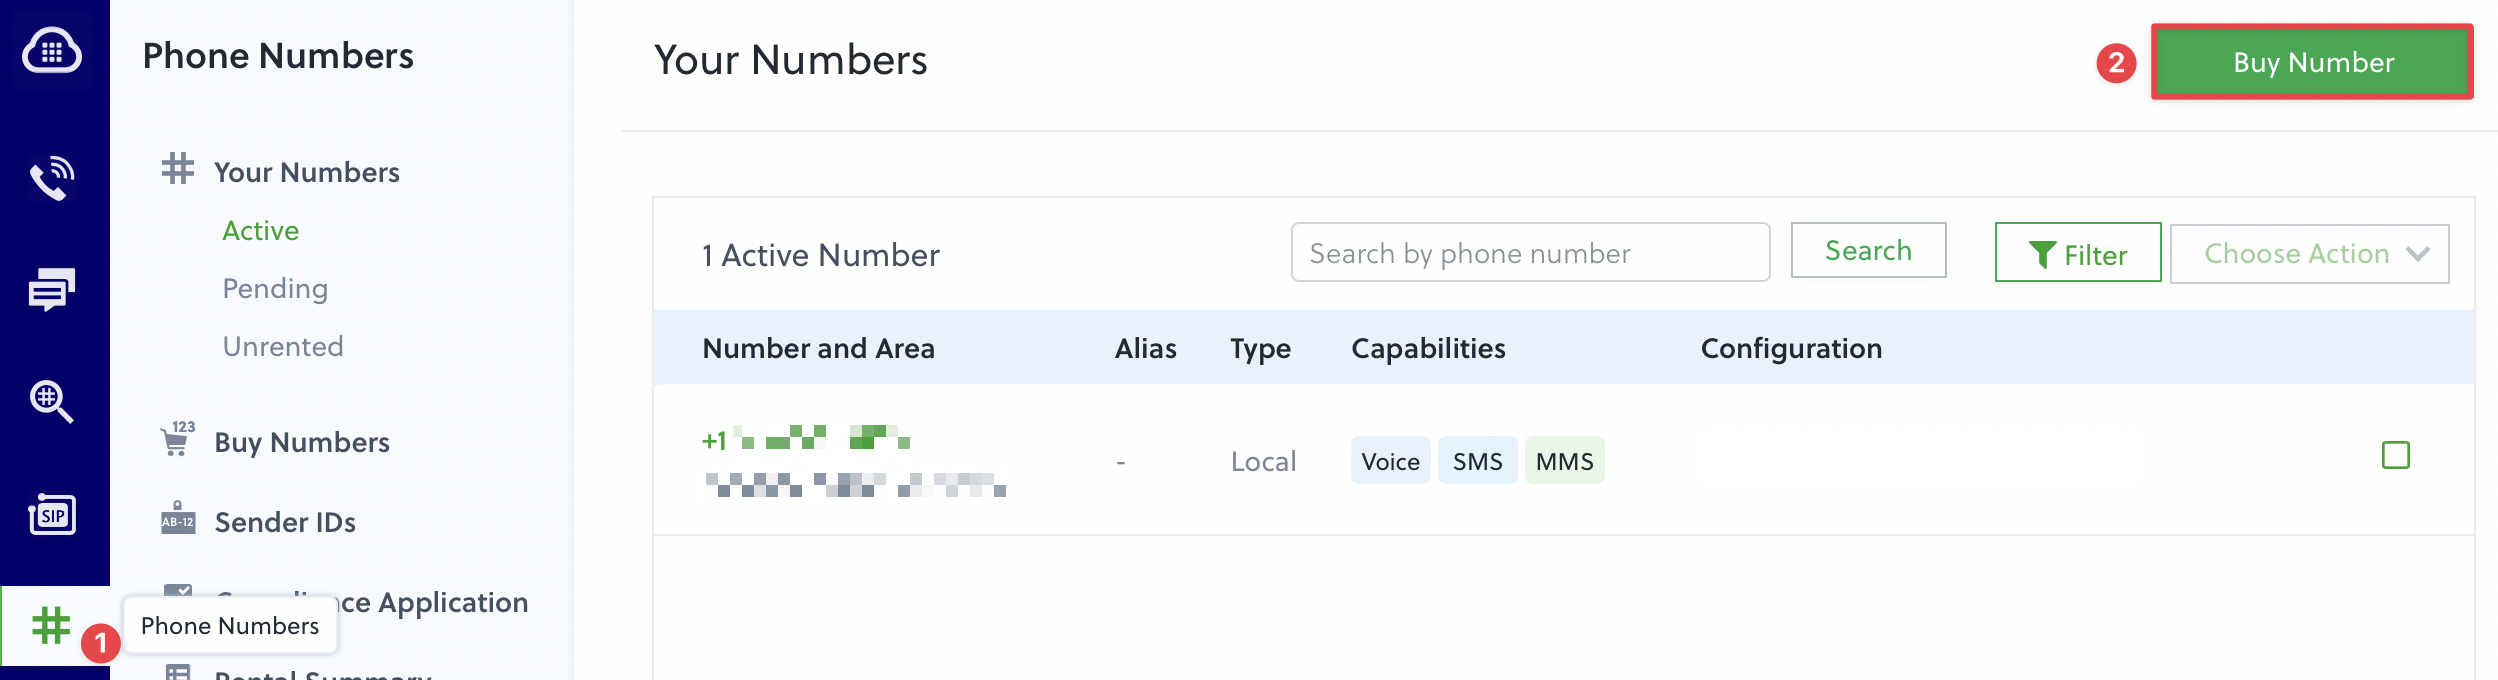
Purchase a number by selecting the Phone Numbers icon in the left navbar, and then click Buy Number. You can search for your desired prefix and country code on the following page. This will be the number that calls originate from:
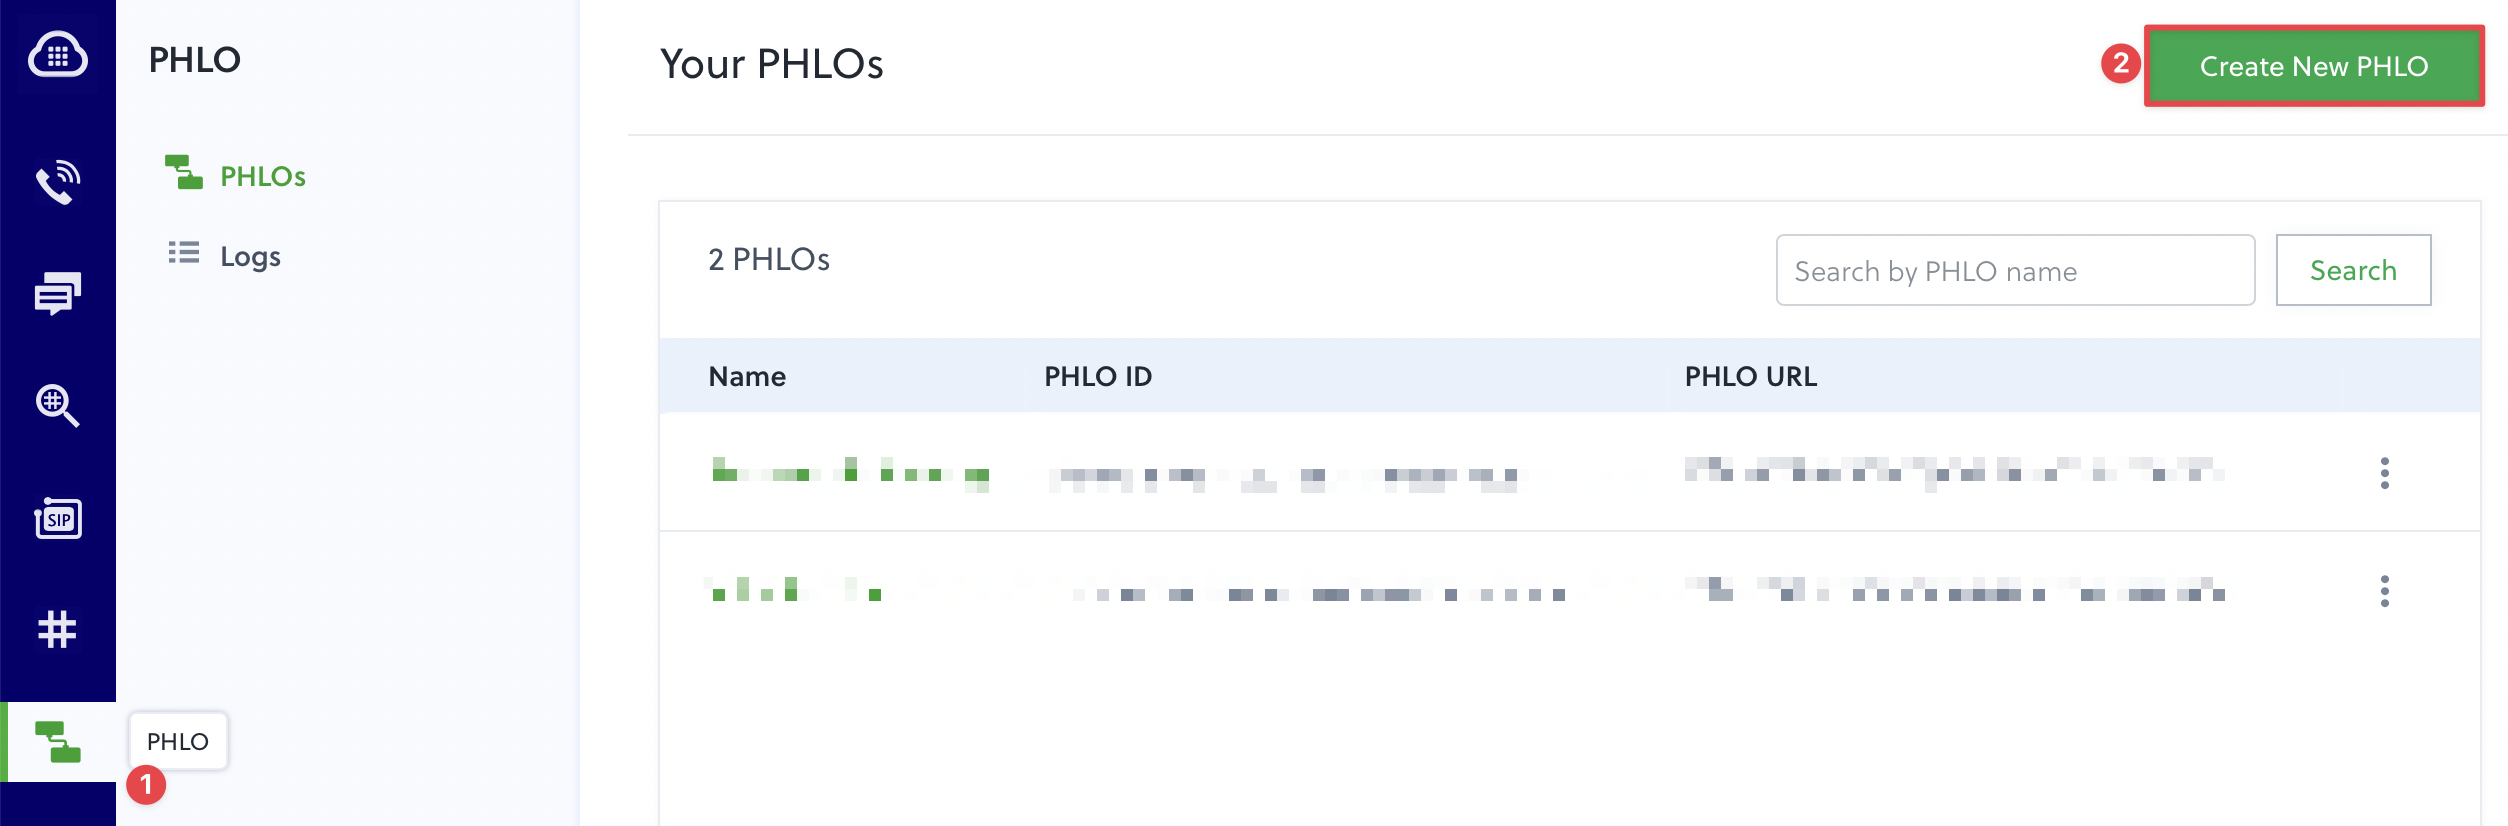
Next, you will want to create a "PHLO." A PHLO is a workflow within Plivo that can be triggered via an API call or other events. Using the left navbar, select the PHLO icon and then click Create New PHLO:
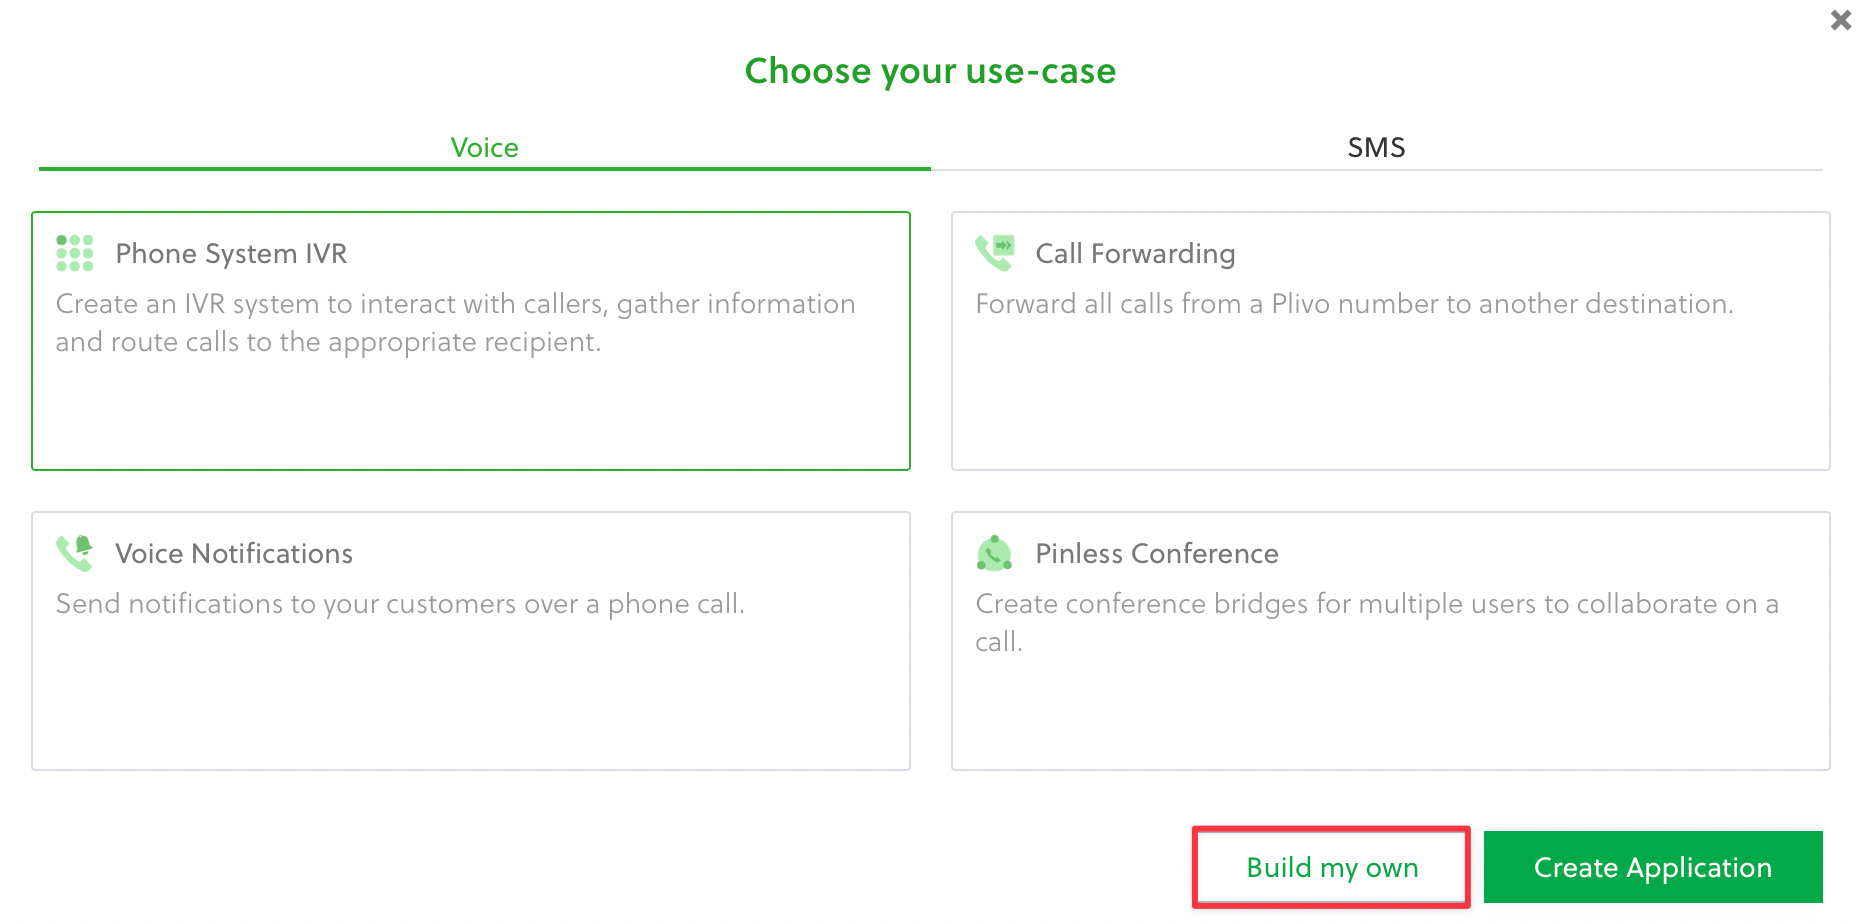
A window will pop up with several options to use as a template, simply select Build my own to start with a blank canvas:
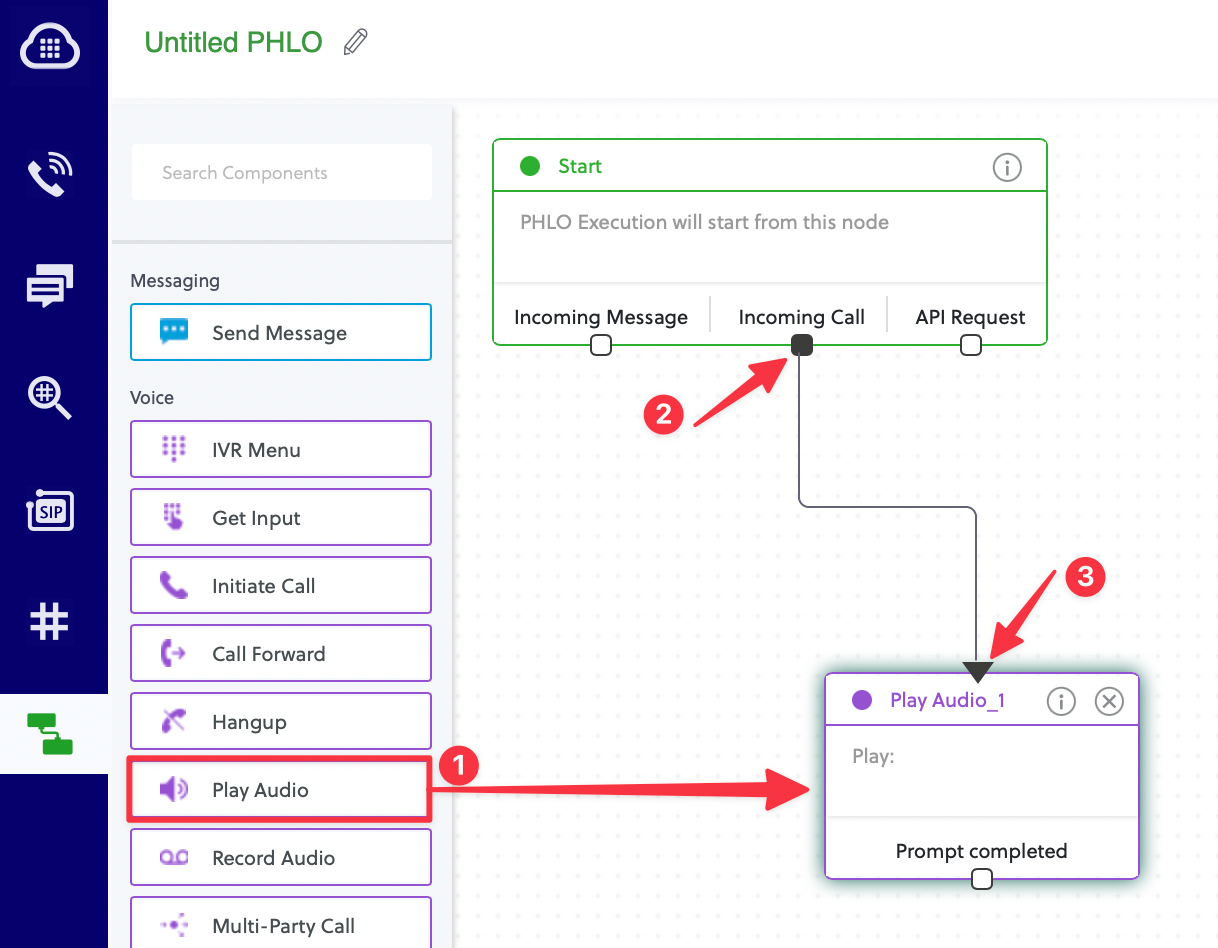
From the components on the left, drag "Play Audio" into your PHLO designer (1). Then, drag a connector from "Incoming Call" within your "Start" component (2) to your new "Play Audio" component (3):
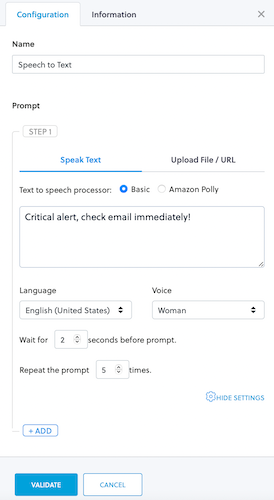
Select your Play Audio component within the designer to configure it. Give it a name, select either speech-to-text or upload an audio file, and specify any advanced settings:
Rename your PHLO in the top left corner and then save it. Click Copy PHLO URL in the top right corner and save this, you will need it in the next section.
Power Automate Flow
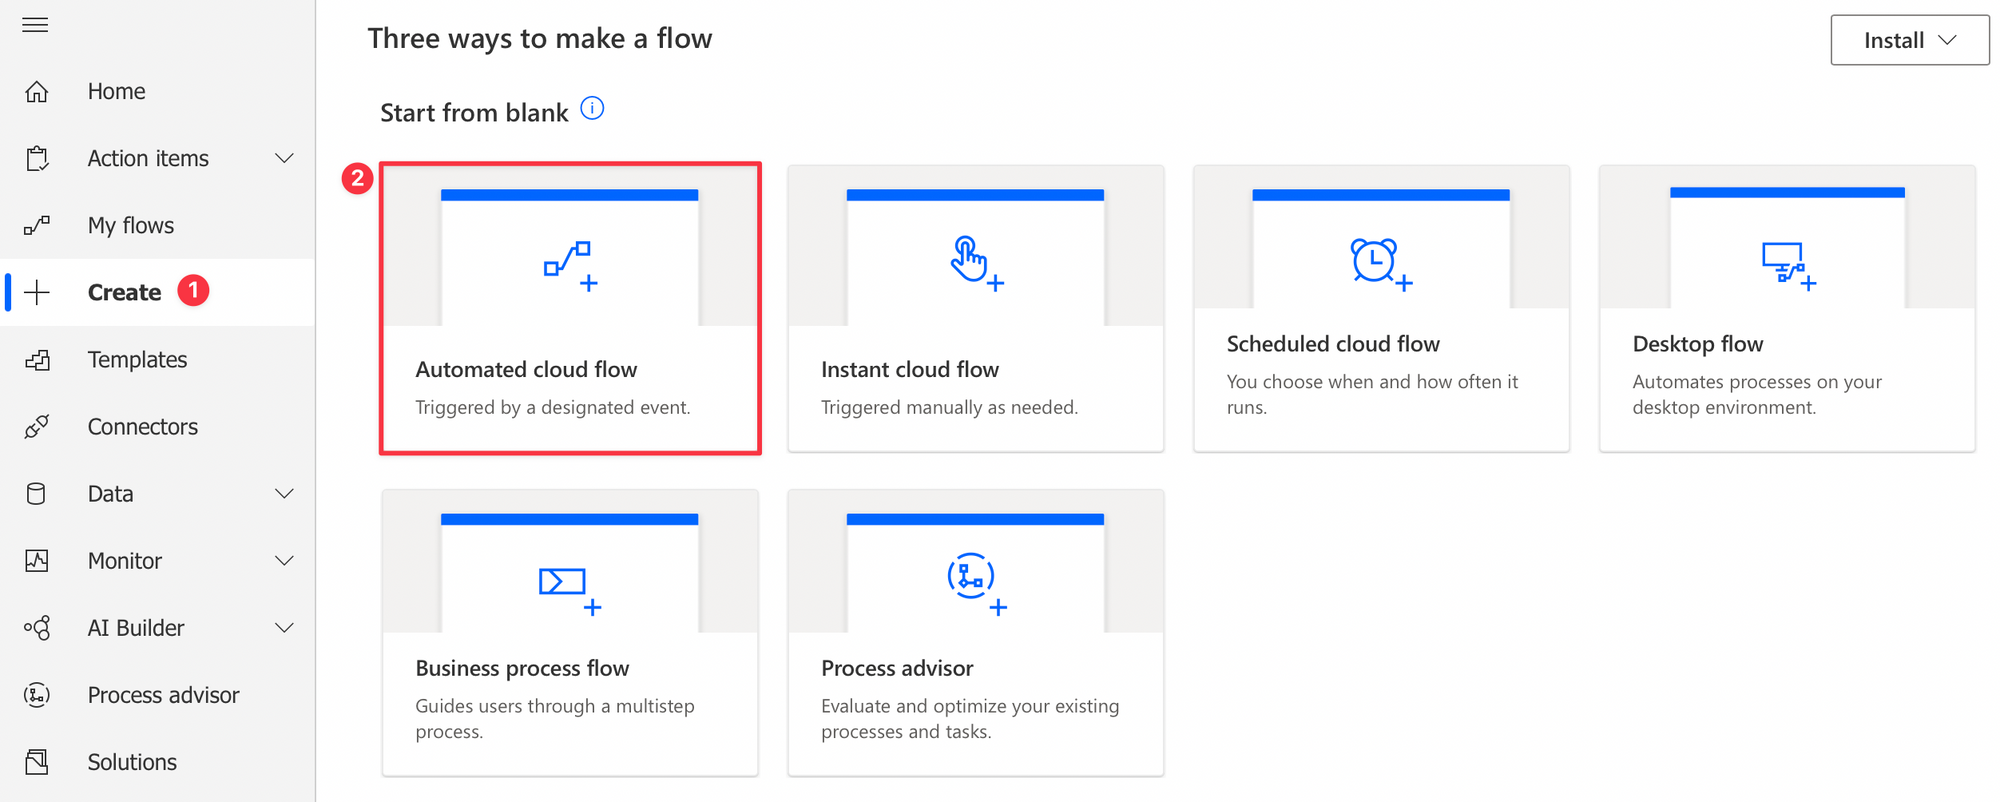
Navigate to flow.microsoft.com and then click Create>Automated cloud flow:
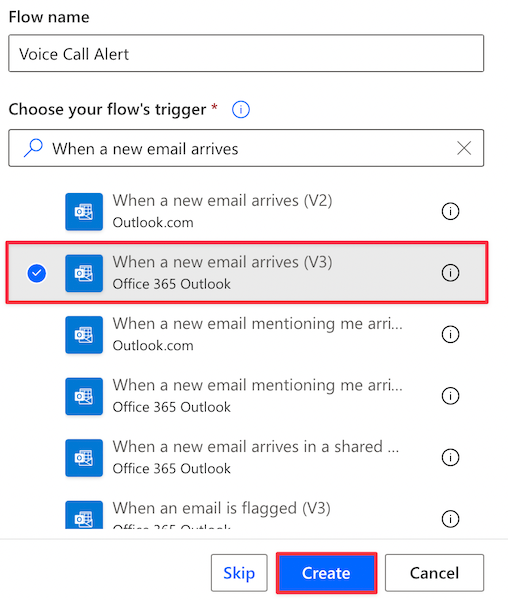
Give the flow a name, and for the trigger select When a new email arrives (V3). Create the flow:
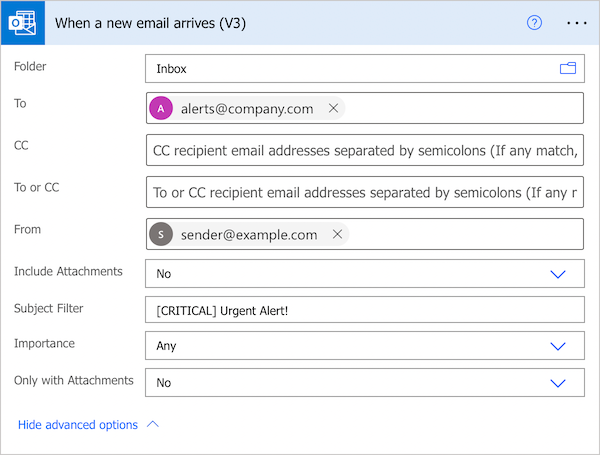
Click Show advanced options within the When a new emails arrives (V3) step. Enter the appropriate values to filter on the alert email you want to notify on:
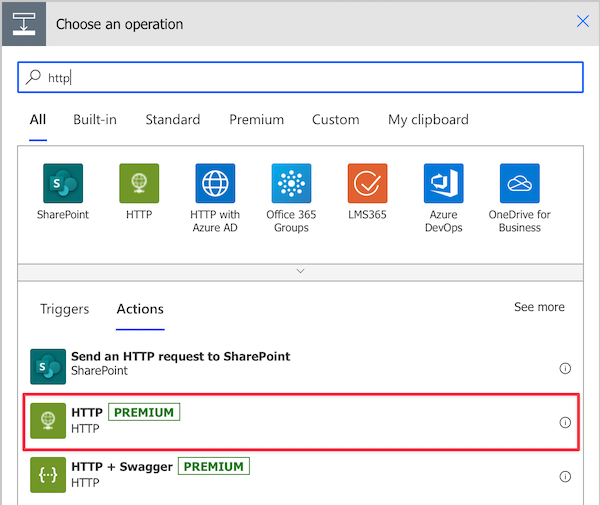
Click the New Step button and add the HTTP action:
Set the method for the HTTP request to POST.
Set the URI to https://api.plivo.com/v1/Account/YOUR_AUTH_ID_HERE/Call/.
Add Content-Type as a key with application/json as its value in the headers.
Use the following as the JSON body:
{
  "from": "PURCHASED_NUMBER_HERE",
  "to": "NUMBER_TO_CALL_HERE",
  "answer_url": "PHLO_URL_HERE",
  "answer_method": "POST",
  "time_limit": "60"
}
Set Authentication to Basic.
Set Username to your Auth ID.
Set Password to your Auth Token.
The action should look similar to this (my use case requires an additional line in the Body):
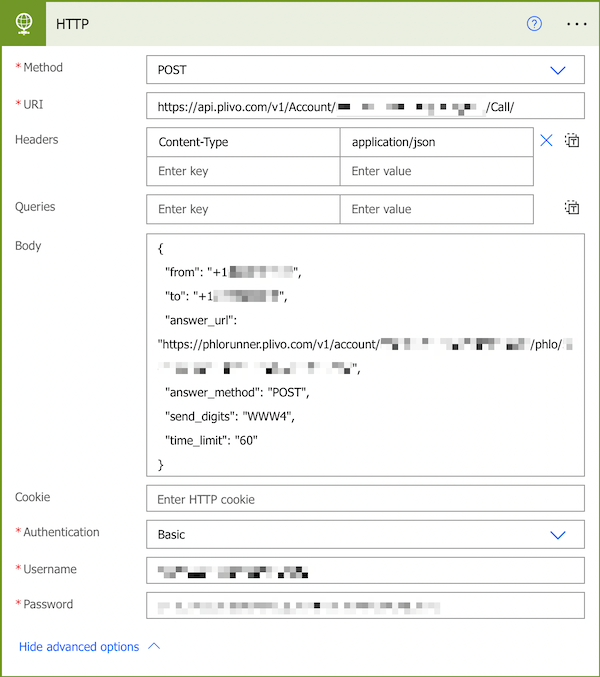
This will use send a POST request to the Plivo Call endpoint which will generate a phone call. The options in the Body will determine what number the phone call originates from and which number is dialed.
After the phone call is answered, a callback is made to the URL specified in the answer_url (your PHLO URL) which will invoke your PHLO. This will either speak the text you specified or play the audio file you uploaded earlier.
Be sure to save the flow.
Next time you receive an email matching the criteria you set, you will receive a phone call automatically. I would recommend setting a unique ringtone and excluding the number from your Do Not Disturb settings on your cell phone to ensure you hear the call.
There are many situations this can be easily adapted to, hopefully you can derive value from a use case of your own.
